Training guide · Ward editors
Site editor
Site editors keep the ward site current week to week: the Sunday bulletin, the calendars, announcements and flyers, reminders and messages, the Church calendar feed, moderation and the ward's settings. It is an assignment, not a calling, and it has no access to the bishopric's confidential workspace.
Demo sign-in (Demo accounts → Sign in with email and password):
editor@steepl.test · password editorOn this page
What you can do
- Prepare, publish and print each Sunday's bulletin, with the hymn picker and speaker confirmations
- Add ward events, plan the yearly events with an owner, and connect the Church calendar feed
- Keep the ward's calendars tidy: add, rename, recolour, move or archive a calendar and choose who can see it
- Approve organization announcements and keep expired ones tidy
- Build flyers from templates and send them to the bishopric for review
- Set reminder rules, send one-off messages, and moderate the study thread
- Keep the ward's settings, the New here? visitor information and the QR codes up to date
Before you start
- To sign in, tap Sign in at the top right. Choose Sign in with Google, or type your e-mail address and choose Email me a sign-in code, then type the 6-digit code from the e-mail and choose Sign in. Use the e-mail address the ward clerk has for you. Trying the demo: on the sign-in page open Demo accounts and choose Sign in with email and password. Enter the test account e-mail and its demo password (the start of the e-mail address — see Demo accounts on the Instructions page), then choose Sign in.
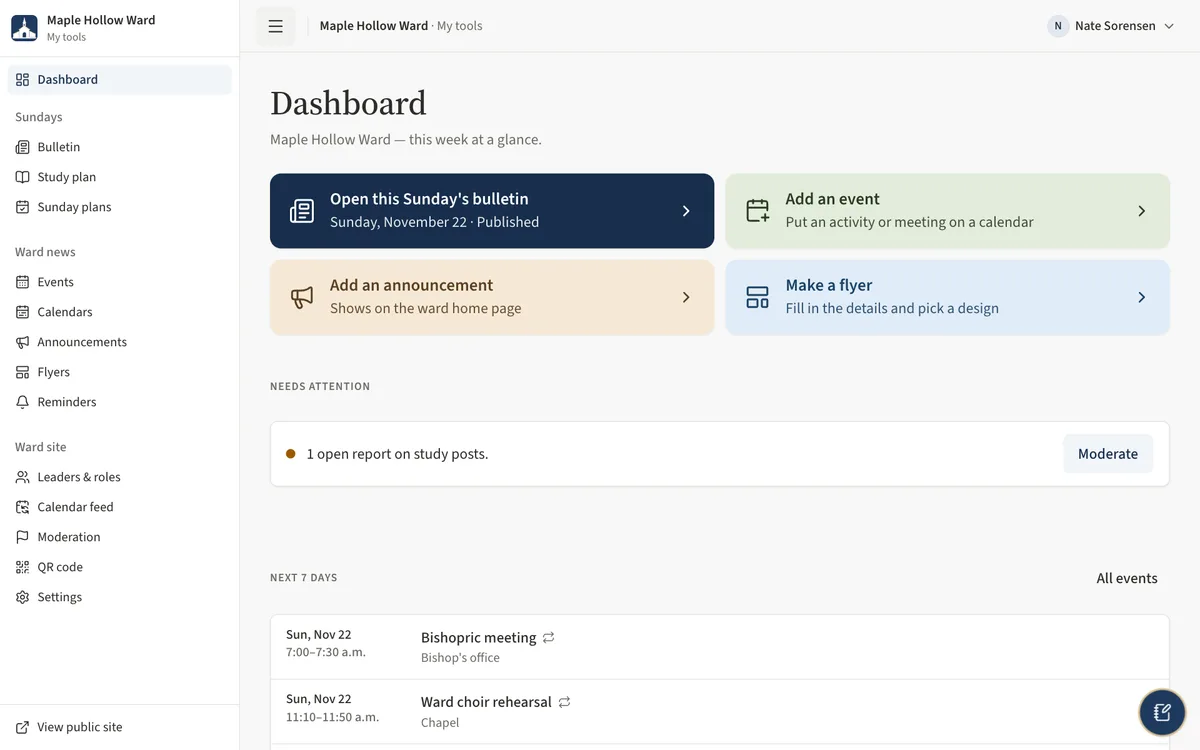
- After sign-in, choose Admin in the ward menu. The sidebar lists Dashboard, then Sundays (Bulletin · Study plan · Sunday plans), Ward news (Events · Calendars · Announcements · Flyers · Reminders) and Ward site (Leaders & roles · Calendar feed · Moderation · QR code · Settings).
- On a phone or a tablet held upright the sidebar is tucked away — open it with the menu button at the top left.
- Each admin page says who can see it. Drafts are never public; nothing is visible to members until you publish.
- Rows keep one main button; the rest — archive, delete, return to draft, downloads — sit in a More menu (the … button) on the row or at the top of the page.
Task 1: Start from the dashboard
- Open Dashboard. The big buttons at the top are the week's jobs: Finish this Sunday's bulletin (or Start… / Open…), Add an event, Add an announcement and Make a flyer.
- Needs attention lists what is waiting — a missing or untouched program, announcements awaiting approval, a feed problem, open reports — each with a button to fix it.
- Next 7 days lists coming events. Ward site covers the Church Calendar feed, Site administrators and Reminders.
Task 2: Fill in Sunday's bulletin
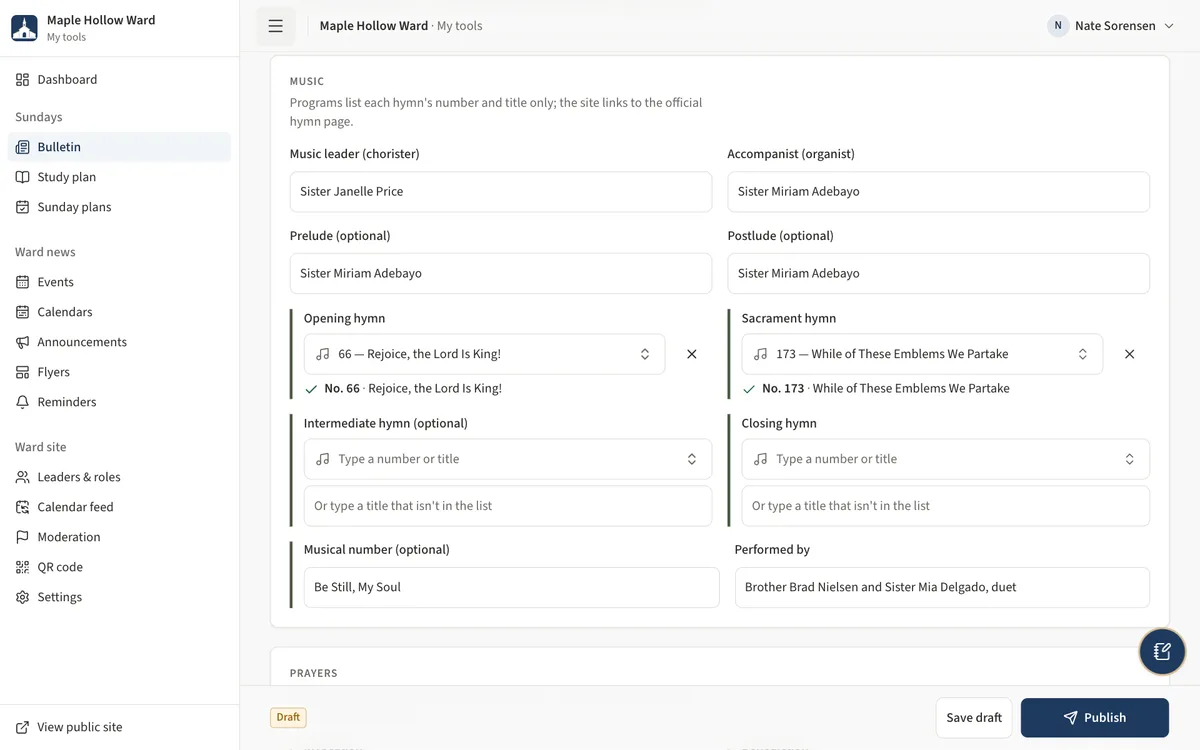
- Open Bulletin and choose the Sunday's date (or Start on a Sunday with no program yet). Copy from last week fills empty people fields from the last published program.
- Under Meeting, set the Meeting type, Presiding and Conducting.
- Under Music, open each hymn and search by number or title (for example “30” or “come come”) — the picker lists all 423 hymns.
- Under Prayers, tick Confirmed once each person has said yes. Under Speakers, choose Add speaker; each starts as Invited — tap it to change it to Confirmed.
- Tick the Announcements to print, check Second hour and Notes, then Save draft.
Task 3: Publish, unpublish and print
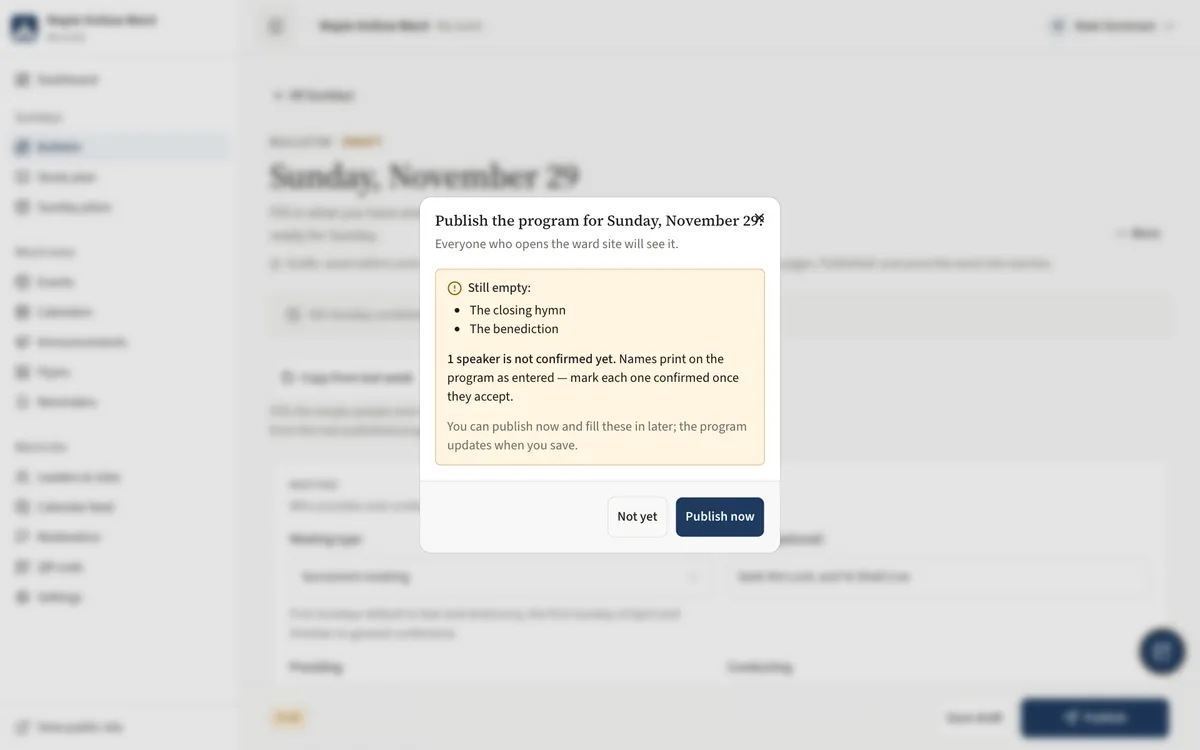
- Choose Publish in the bar at the bottom. It always asks first: Publish the program for that Sunday, and lists anything Still empty and anyone not confirmed yet.
- Choose Not yet to go back and finish, or Publish now. You can publish with gaps and fill them in later.
- To change a published program, edit it and choose Save changes — members see the update straight away. Unpublish returns it to draft.
- A draft started by mistake can be removed from the More menu at the top of the page: Delete draft.
- To print, open the public bulletin with Preview and choose Print — it prints as a half-letter program with the QR code.
Task 4: Add events and plan the yearly ones
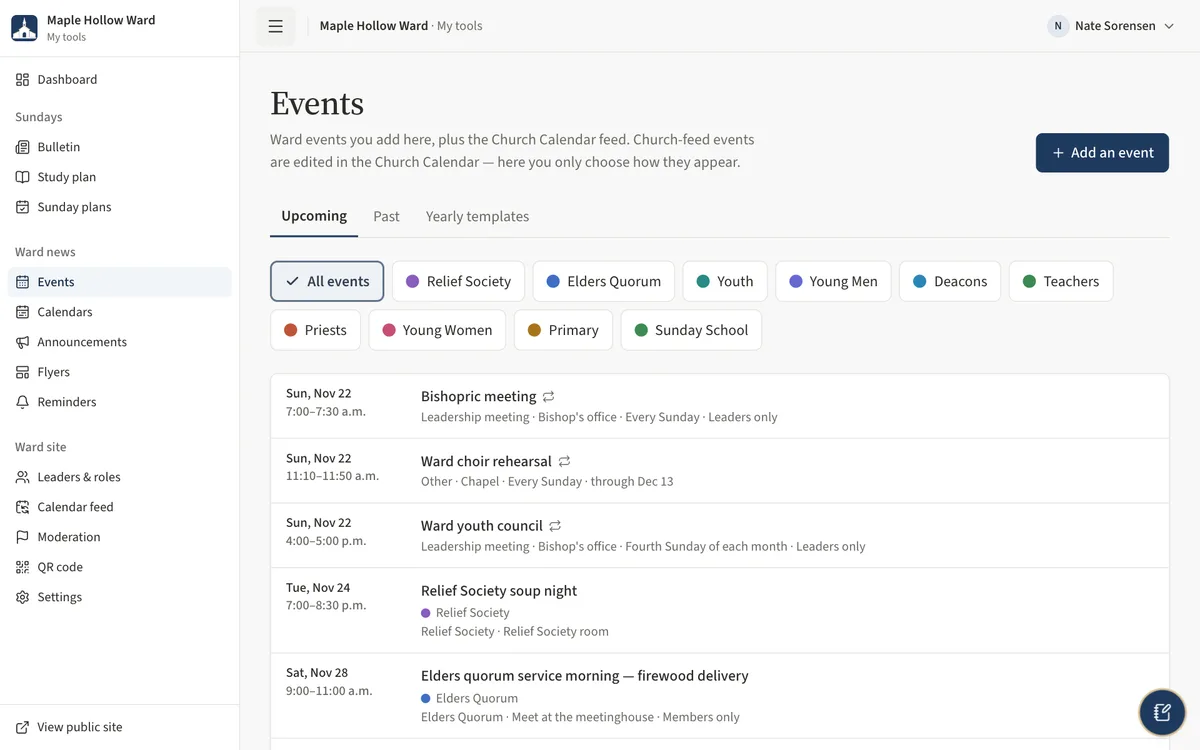
- Open Events and choose Add event. Enter the Title, Starts, Category and Who can see it; add an Owner (optional) and Repeats if it recurs, then Add event.
- Events from the Church calendar show their source; open one to change only its Category, visibility or Hidden from the site.
- Open Yearly templates for the events every ward holds. Choose Plan with the year (for example Plan 2027), set the Date and an Owner, and Plan this year's event.
- The plan's Checklist shows what is due and what is overdue; tick items as they are done and choose Mark done for the year when the event is over.
Task 5: Keep the ward's calendars
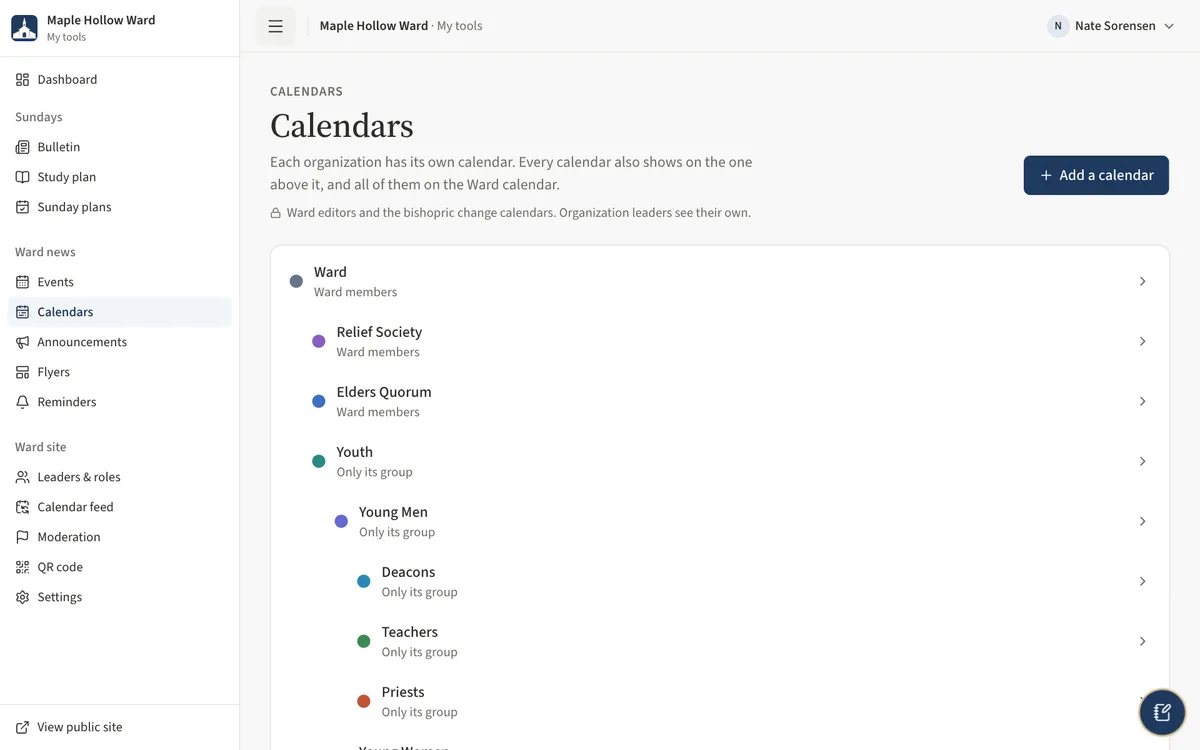
Each organization has its own calendar and colour. Every calendar also shows on the one above it, and all of them on the Ward calendar.
- Open Calendars. The list shows each calendar with its colour and who can see it: Everyone, Ward members or Only its group.
- Choose Add a calendar for a new one (for example Activity Days): enter its Name, what it is Part of, a Colour and Who can see its events?, then Add calendar.
- Open a calendar to rename it, recolour it, move it (Part of) or change who can see it, then Save changes. Archive hides it; its events are kept.
- When you add an event, Which calendar? puts it on one calendar; Combined with (optional) adds a second group — it shows once, with both colours.
- Group calendars (youth, Primary) are opened by their leaders and the bishopric: they share the link and answer Waiting to join.
Task 6: Approve and tidy announcements
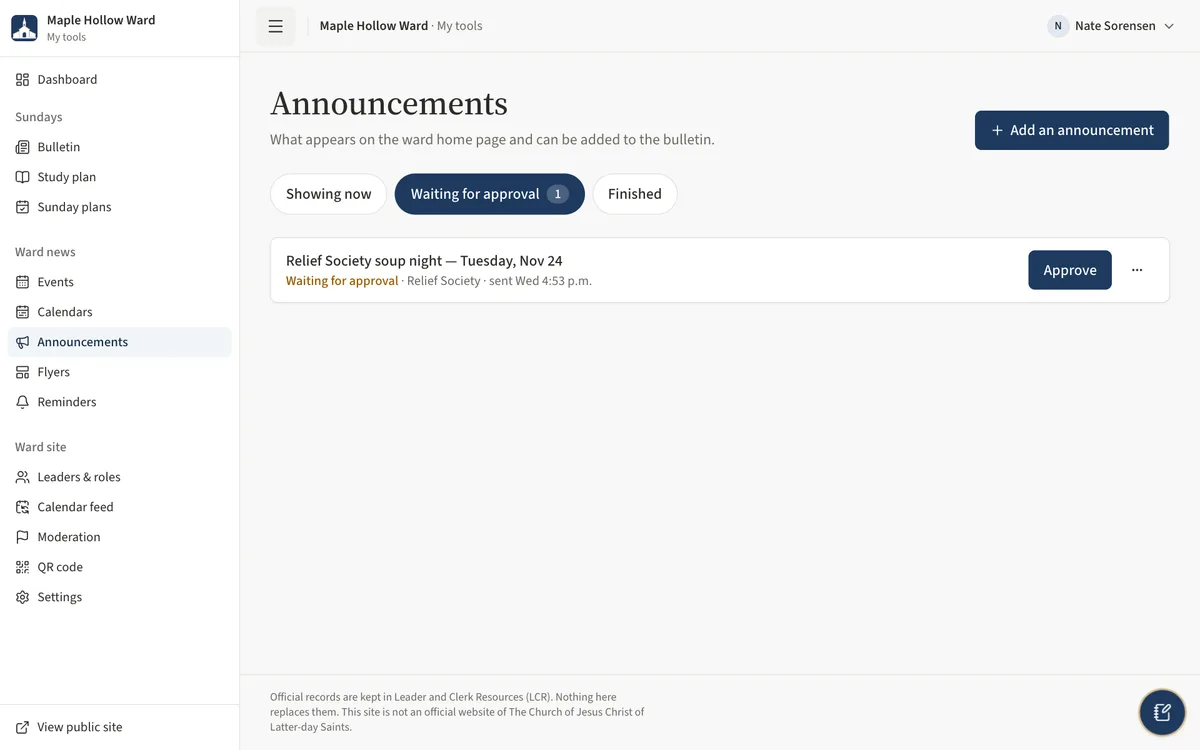
- Open Announcements. Organization leaders' submissions are on the Waiting for approval tab.
- Read each one and choose Approve, or open More and choose Return to draft if it needs changes.
- To write one yourself, choose New announcement, fill in Title, Show from / Until (optional) and Audience, and Publish announcement. Pin to the top keeps it first on This week.
- Use the Expired filter for announcements past their end date, and open More to Archive what is no longer needed.
- Stake-wide announcements are published by the stake and appear on This week and the bulletin next to the ward's. The bulletin editor lists them under Announcements too, so you can tick the ones to print.
Task 7: Make a flyer
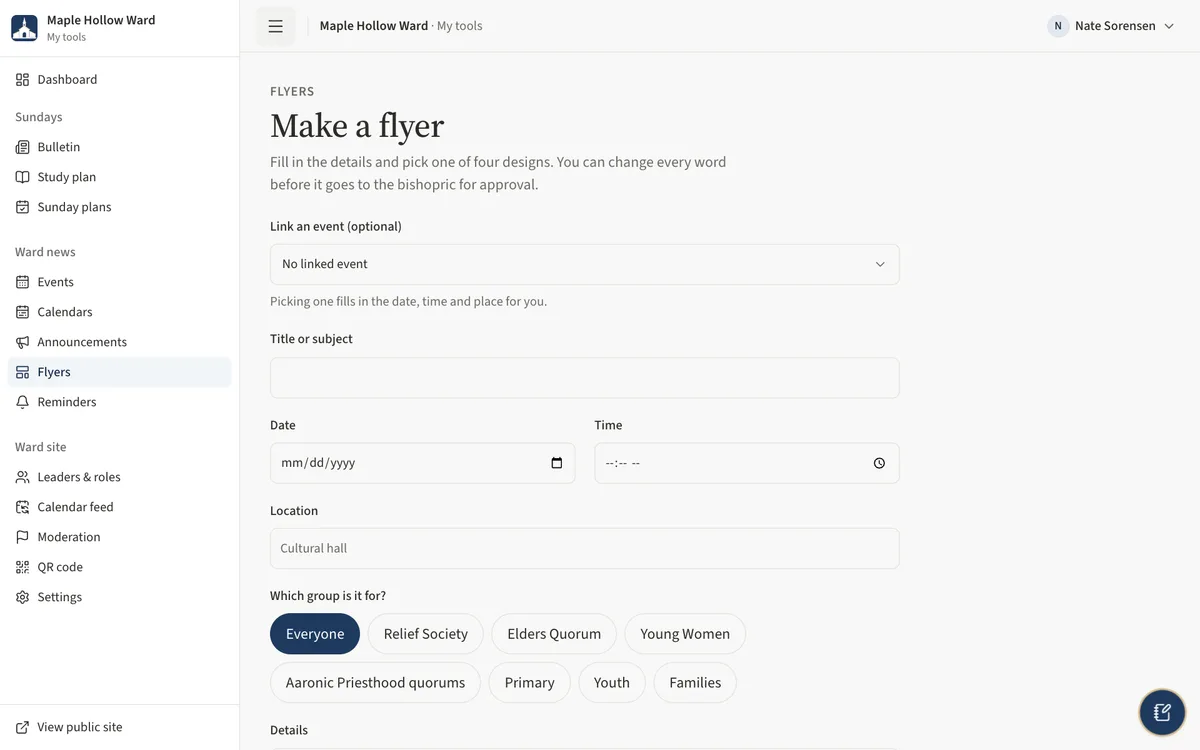
- Open Flyers and choose New flyer.
- Optionally Link an event, then fill in Title or subject, Date, Time, Location, Who it’s for, Details and Vibe.
- Choose Generate 4 flyers (or Build 4 template flyers when AI drafting is not set up), then Use this one on your favourite.
- Refine the text, Template and Palette, then Submit for review. A member of the bishopric approves each flyer before members see it.
Task 8: Study plan and Sunday plans
- Open Study plan to set the general conference talk Elders Quorum and Relief Society study each Sunday: choose Choose talk, search by title or speaker, and choose Save for that Sunday.
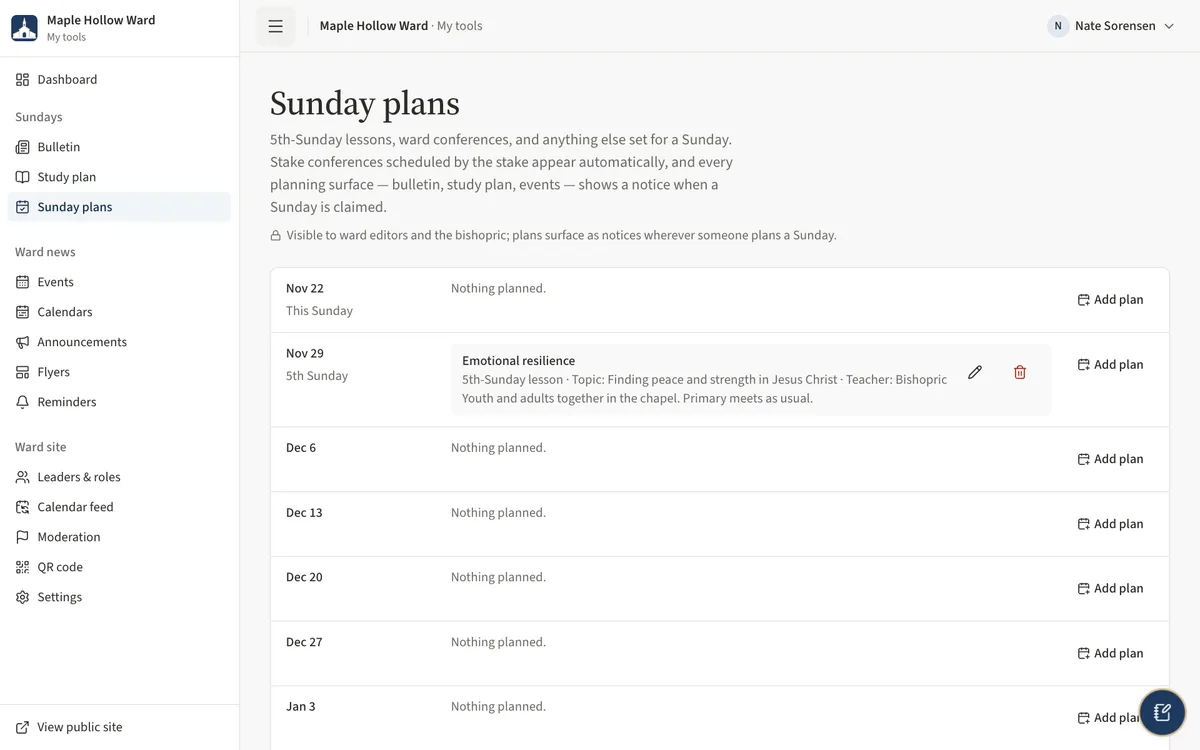
- Open Sunday plans for 5th-Sunday lessons, ward conferences and other plans: Add plan on the Sunday, pick the Kind, add a Title, and Save plan.
- Stake conferences scheduled by the stake appear on their own, and every planning page shows a notice for a claimed Sunday.
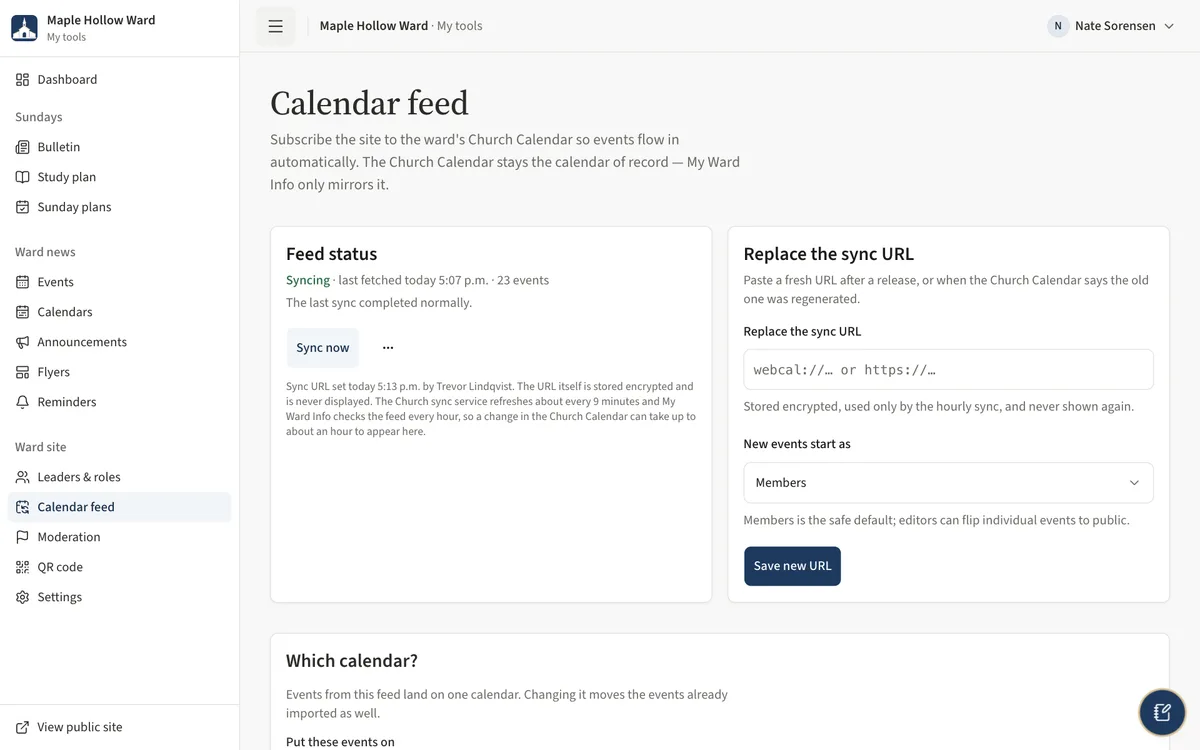
Task 9: Connect the Church calendar feed
- Open Calendar feed and follow How to get the sync URL — sign in to the Church Calendar, choose the calendars, generate the sync URL.
- Paste it under Church Calendar sync URL, choose New events start as, and Connect the feed. Once a feed is connected, the same card reads Replace the sync URL, with Save new URL.
- Feed status shows the health, when it last fetched and how many events; Sync now checks straight away.
- Under Which calendar?, choose the calendar the imported events go on (Put these events on) and Save. Changing it moves the events already imported too.
- Under Filters, add a rule such as Hide events whose title contains “Gym” and Add filter.
Task 10: Reminder rules and messages
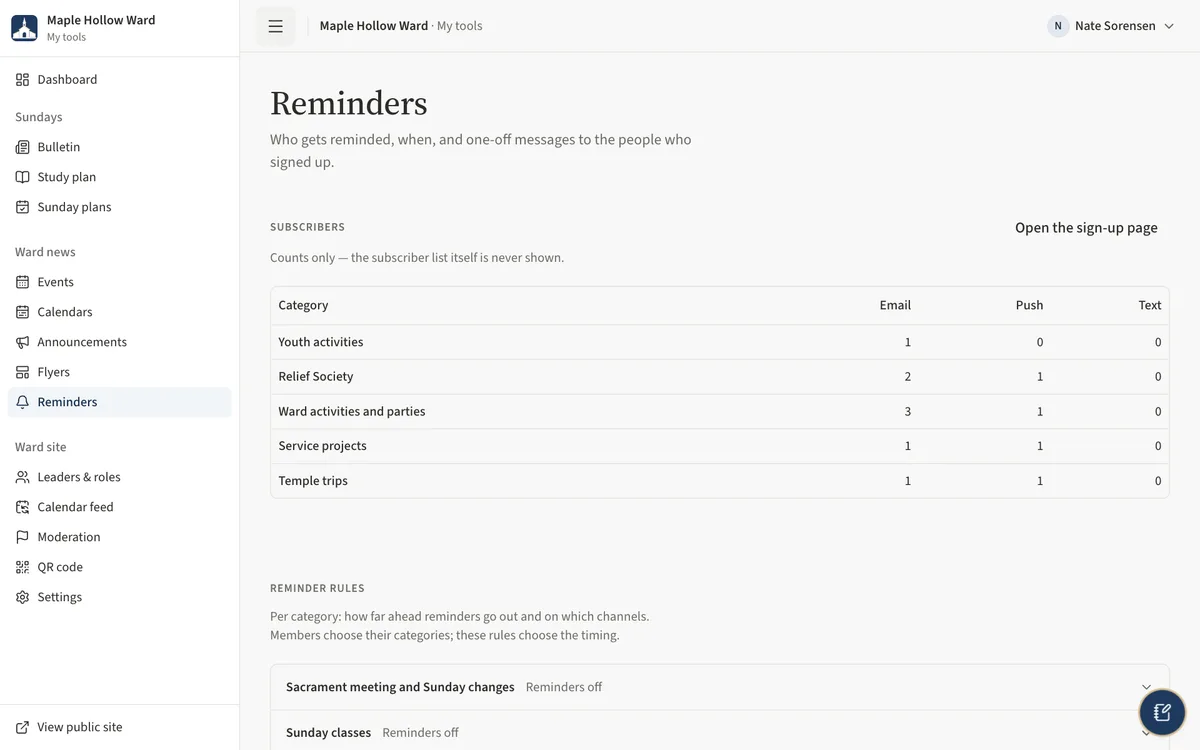
- Open Reminders. Subscribers shows counts only — never the list.
- Under Reminder rules, open a category, choose When and Channels, and Save rule.
- Under Send a message, write a Subject and Message, pick who gets it, then Preview and Send now (or Save draft).
- Messages drafted by organization leaders wait under the message list — choose Approve & send or Cancel. The Delivery log shows what went out.
Task 11: Moderation, QR codes and settings
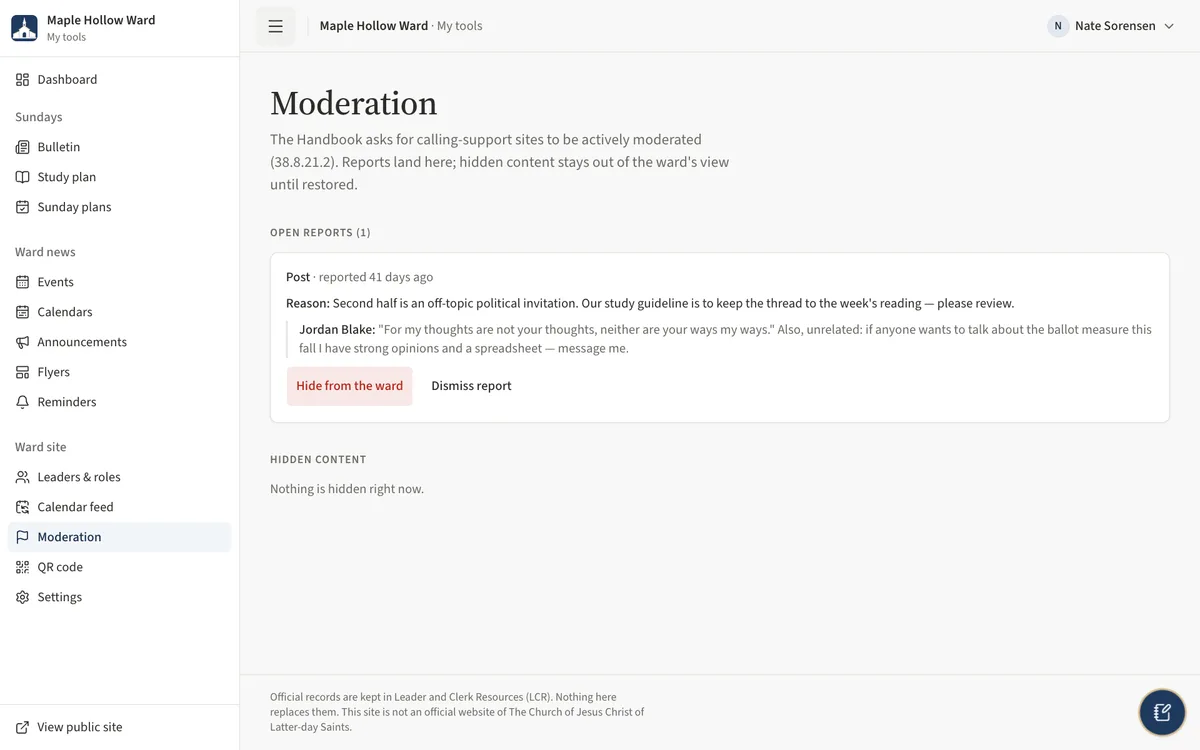
- Open Moderation. For each report under Open reports, choose Hide from the ward or Dismiss report; hidden posts can be restored later.
- Open QR code and choose Poster to print the door poster.
- Open Settings to keep the meeting time, address and contact current, and fill in New here? (for visitors) — what to expect, children and nursery, parking, who to contact. Then Save settings.
- Leaders & roles is read-only for site editors — ask the clerk or bishopric to add or change leaders.
UAT checklist
Tick each flow once you have confirmed it works as described. Note anything unexpected — a wrong label, a missing button, an error — under “What did you see?” and send it to your UAT coordinator.
What did you see?
Account used, date, device, and anything that did not match this guide.